Showing posts with label Camera. Show all posts

Saturday, December 11, 2010

Joby Gorillapod SLR - review

I held off long enough on getting a gorillapod - till today! I'm writing this review just a few hours after purchasing it, something which I don't usually do, but it's a product that's straightforward and easy enough to recommend.

Gorillapod SLR supporting a 500D & 17-85 lens
I regretted not getting this earlier.  It simply is one of the most useful and ingenious mini camera supports I know.

And if you don't already know, a Gorillapod is mini tripod with bendy legs, allowing one to 'wrap' the tripod around natural objects or fixtures such as fences, railings or poles for those casual snapshots.

On paper, Joby claims a max weight of 800g.  As seen in the picture, this 500D + EF-S 17-85 combi tips the scales at slightly more than 900g, but with proper balancing of the tripod legs, it will still support it very steadily.

The tripod itself weights an insignificant 165g, and it uses a universal quarter-inch tripod screw.  The joints are all flexible, with the grey parts being rubberised for added grip.  The mounting plate slots in nicely to the tripod, and provides a simple bubble level. 


Tripod mount
What's missing though is a ball-head system.  I think there's another model with a ball-head, but it's too gigantic for my taste.  Basically to lock the plate in, you simply slide it into the groove till it clicks.  To remove, simply depress the button below and slide the camera out - idiot-proof!

Now this tripod isn't meant to replace a traditional tripod, and neither is it meant to be a professional camera support.  I see this more as a secondary form of camera support, either for a small SLRs or compact camera, to be brought out when I go for casual street shooting, or to be used when taking group shots with friends over dinner where I could at least control the composition instead of handing it over to the waiter who returns more often than not with blurred shots. 

This is not a serious tripod.  I wouldn't recommend it for critical landscape work for example.  The Gorillapod is meant for fun - for those days when I wouldn't lug my big Manfrotto 190xprob around town, this is the perfect replacement. 

Lock ring - to lock the tripod plate in for added security
Gorillapod supporting 430ex with Trigmaster

But wait! There's more! Besides supporting cameras and videocams, I think this is the perfect support for flashes as well.

Seen on the left, the Gorillapod will support flash units such as my Canon 430exii - perfect when using off-camera flash.  Instead of holding the flash with my hands or getting an assistant to do that, I can wrap the Gorillapod around nearby objects.  This makes for very versatile lighting setups.

To sum it up, there's very little to complain about the Gorillapod SLR, and there's every reason why any photographer would benefit from one of these accessories.  It's a no-brainer, if you're scouting for a tripod which will fit into the bag, THIS IS IT.

The Joby Gorillapod SLR - 5 stars.  Very pleased!

Thursday, May 13, 2010

Lowepro Terraclime 100 Quick Look

A unique camera bag from Lowepro, not suitable for all photography purposes but works great as a walk-around camera bag :)

Sunday, January 31, 2010

Experimenting with white balance

Fiery Skies
Image copyright Ian Ho 2010

Made this image last night... It's a 1.5 minute long exposure @ 16mm ultra wide angle.

If you ask me what makes this image work, I'd say it's two things. Firstly, the cloud formation and movement captured during the long exposure. Secondly, it's the fiery colours.

Now of course the sky wasn't this red... so how did I achieve it? Simple! Set white balance to cloudy! This warms up everything in the shot and in this example contributes to the mood and emotional element of the picture, and adds more 'drama' to the clouds. I think this image wouldn't have worked at all in auto white balance.

The simple tip here is that photography need not always reflect what we see. So try experimenting with various white balance settings to create something different!

Thursday, January 28, 2010

Hoya Circular Polariser Review

Got this filter for my landscape photography. Overall satisfaction is 4/5.

Monday, January 18, 2010

Canon EF-S 55-250 IS Review

Upgraded to this lens from the Canon 75-300 III, mainly for the stabiliser and better image quality.


Optical quality: 3.5/5
Build quality: 3/5
Ergonomics: 4/5
Value: 4.5/5

Update: I forgot to mention, the vignetting problem can be reduced if your camera supports peripheral illumination correction (e.g. 500D, 50D, 7D). That function will ensure even illumination across the image.

Friday, January 1, 2010

Canon 17-55mm Quick Look

[If you have no interest in watching boring equipment reviews, do me a favour by skipping this video, thanks.]

I figured talking was easier than typing, hence a video.

I just shot Nat and Charmaine's wedding today, and put this rented lens to the test. I share my thoughts on using this lens for events coverage.

Saturday, December 5, 2009

Canon 10-22mm mini review

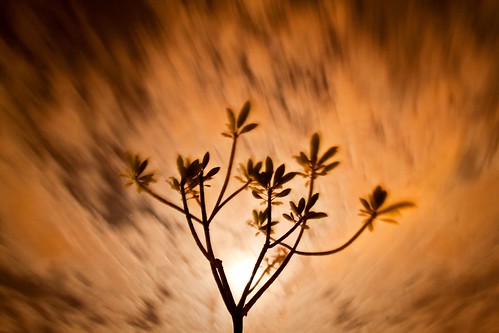
Church camp ended today! Being camp photographer and shooting 3.5 days non-stop is surely tiring, but once again I'm ever thankful to serve Him with whatever skills I have. I initially thought the camp would be boring and kiddish, but no no it was a meaningful and enjoyable time, and a refreshing encounter.

Throughout the camp I put my new Canon 10-22mm f3.5-4.5 USM lens to the test. I've not used it extensively enough to know everything about it, so keep in mind this review is sort of a first impressions kinda thing.

If you're into MTF charts and what not, then I suggest heading over to the Luminous Landscape. My review is based on actual usage of this lens.


Firstly, this lens is an EF-S lens, so it will only work with Canon cropped bodies, and not with full-frame (FF) cameras like the 5D mark 2. I use this lens on the Canon 500D. Factoring in the 1.6X crop factor, the equivalent focal length is 16-35mm, which goes from ultra wide angle (UWA) to wide angle. Thus if you're thinking of going FF later, you might want to avoid this lens.

If you've used the Canon EF-S 17-85 or EF-S 17-55 lenses, you'd immediately feel at home using the EF-S 10-22. These lenses are very identical in terms of build quality, operation and design. The first thing I noticed about the 10-22 is its light weight and compact size. It is lighter than both the 17-85 and 17-55, and marginally shorter than the 17-85. The filter thread size is 77mm, which is the same size as most of Canon's pro lenses. I could carry this lens the whole day without complain.

In terms of build quality, it is very good. It sports a metal mount, a distance scale, full-time manual focusing (FTMF), and internal zooming. That means the lens does not extend when zooming (but the front element shifts in and out while zooming). The build quality, is however, not as good as the "L" series. That said, this lens is sturdy and strong enough for daily use, and should be more than acceptable for many photographers. The focusing mechanism of the lens is also very good. Focus is fast and quiet thanks to the ultrasonic motor. The minimum focusing distance is also really close, at 24cm. Again, if you've used the 17-85, the focusing speed and accuracy is almost identical, and both very good.

Now to the optical quality of the 10-22. This is where the lens really shines. Although it does not have the "L" designation, it is an optically excellent lens. I've tried shooting wide open during camp in indoor lighting conditions, and got very very sharp photos. Generally speaking, this lens was designed to perform well wide open. Stopping down does improves border sharpness, while centre sharpness doesn't seem to visibly improve at all. I was shooting at around f5.6 during the camp with flash, and at that aperture the entire frame is decently sharp as long as it's within the depth-of-field. If you don't get sharp photos with the 10-22, its likely due to mis-focus or long shutter speeds as opposed to lens sharpness issues.

Distortion on the 10-22 is also very well managed. In real-world usage it is not an issue at all. However, lens test do show a little bit of barrel distortion at 10mm. At 22mm, it is distortion-free.

If there is something negative about the 10-22's image quality, that has to be chromatic aberration (CA), or purple fringing. Generally, CA is well-managed for a UWA. It is within acceptable limits, but it is noticeably there when viewed at 100% magnification. It is more pronounced when shooting in high-contrast lighting, and less so when shooting indoors. However, if you are a photographer and not a pixel-peeper, then I can say CA is a minor issue, and can be corrected in post.

Other than that, it seems to me that the 10-22 is an optically perfect lens. It is surely not "L" build quality, but optically, I dare say it is. I wouldn't hesitate to say this is a professional lens when it comes to the images it produces.

Lastly, how does the 10-22 compare with other UWAs on the market? So far, I've used the Tokina 11-16 f2.8 and the Sigma 10-20 f4-5.6, and so I'll make a few quick comparisons.

Of these 3 UWAs, the Sigma 10-20 is the least impressive. It is the least sharp wide open, and only works well at f8 onwards. If I have to choose one UWA specifically for events coverage, it will still be the Canon 10-22. The Tokina is also a very good lens, but the main problem is the limited zoom range. I would prefer to have the more versatile range of the Canon than the fast 2.8 aperture of the Tokina.

To conclude, I do not regret getting the Canon 10-22mm. If you shoot Canon and want a UWA, I wouldn't hesitate to recommend this lens to you. I love the super wide 10mm view and the unique effect it gives, and in cramped shooting situations this lens will help you get everything in.

However, apart from events coverage, another application would be in landscape/architecture photography. In fact this was the main reason why I purchased it. Will shoot some landscapes and share my experiences in the coming weeks. But for now, this lens is highly, highly recommended, as long as you don't intend to go FF in future!

Sunday, October 4, 2009

Tokina 11-16 VS Canon 17-85 lens test

My good buddy Keith lent me his Tokina 11-16mm f2.8 AT-X PRO super wide-angle lens this week to play with. Despite it being a third-party lens, it is a very high quality lens comparable to other top notch UWAs, such as the Canon 10-22mm. The distortion at 11mm is very slight, while at 16mm, distortion is almost non-existent. Sharpness when stopped down 1 stop from f2.8 is very good, and at f8.0, it is incredibly sharp across the frame. The build quality is solid, the zoom ring is smooth, and the lens is quite compact.

But then I started to wonder, just how much better is the Tokina as compared to a standard zoom lens, at wide angle 28mm? So I decided to do a quick, unscientific test between the 11-16 and my Canon 17-85 f4-5.6 IS USM. I'm just investigating the optical quality here, and my test does not take into consideration other factors like price, build quality, weight etc.

So I got my 500D steadied on a tripod and shot 2 frames at 15MP, deliberately ensuring there were high contrast areas in the picture so I could compare chromatic aberration.

I shall let the pictures speak for themselves, and yes you may pixel-peep. Click to enlarge.

11-16 (Resized, with slight crop):

17-85 (Resized):

And now for the 100% crops where the difference is noticable:


The conclusion is simple and clear-cut: if you're shooting at 28mm most of the time, get the Tokina 11-16 over the 17-85. The Canon's chromatic aberration is horribly bad compared to the Tokina. Sharpness wise the difference is less obvious, though the Tokina is much sharper of course.

Tuesday, July 21, 2009

Quick Canon 500D update

My Canon 500D is about 2 months old. It is my main workhorse. Having used it thus far, here's what I think are the 3 most important upgrades from the 400D, my previous camera.

1) Live view mode
It comes in really handy especially when working on a tripod, where placing your eye at the viewfinder while composing may be cumbersome. I have used it 99% of the time while shooting macro stuff. Also allows for very precise MF if the situation calls for it.

2) Higher ISO
OK truth be told: the 500D is a noiser camera compared to the equivalent Nikons, i.e. the D5000 and D90. However, that said, the high ISO performance on the Canon 500D is decent. Compared to the 400D, I would say it is a one stop noise advantage, with NR turned on. That means a lot when working in low-light. Photos are perfectly usable up to ISO 1600, and ISO 3200 is fine as long as you're not making big prints.

3) Bigger, sharper screen
It is a JOY working with the sharp 920K dot 3" screen. It allows me to check with confidence if a shot is sharp or not. Colours are brilliant and the screen can be very bright at max brightness.

So that concludes what I think are the most significant feature upgrades from the 400D. There are many many many other features which contribute to making the 500D a wonderful camera, but I consider these 3 the most valuable.

Thursday, June 25, 2009

Shooting what you love... or not?

Fresh Greens
Image copyright Ian Ho 2009

An issue that all photographers have to deal with is about how to stay constantly motivated and passionate about photography. We all get a bit jaded once in a while and lose our creative direction. And perhaps my answer to that is simply 'shoot what you love!'

If you love wildlife, birds, animals, then go out and shoot them! If you are like me and love beautiful landscapes, then go out there and just shoot them! The idea here is that by shooting what truly makes you happy, you will really enjoy your craft as it is something you can relate too.

But I also realised that this attitude of 'only shooting what you like' can be a dangerous one. Although specialising in a genre of photography and exploring it in-depth is good, I feel we should not do this at the expense of being versatile with different types of photography. In other words, breadth and depth is needed for us to experience fully what photography is. Although we are to shoot what we love, I feel that occasionally it is good to shoot what we do not quite like too. And the main reason for doing so is to improve ourselves to become more all-rounded photographers.

For me personally, I love landscape and nature. I HATE sports and to a lesser extent portraits/people photography. I spend most of my photography time on landscapes, BUT I also try hard to improve my sports photography and learn the ropes whenever opportunity comes.

Just sharing with you some of my thoughts... yes it is true to shoot what makes you happy, but once in a blue moon get in touch with what you dislike too :)

Saturday, June 6, 2009

Canon 500D

About half a month ago, I upgraded from the Canon 400D to the new 500D/T1i SLR. I was actually contemplating between the 40D and the 500D, but found that the 500D would be sufficient for my shooting needs since I do not need the 6.5fps. Furthermore, the 500D had higher ISO speeds, shoots video, has a gorgeous screen, and as a boon has more megapixels too.

In the short time I have been using it, I am really impressed with the 500D. Although it is an entry level, 'low-end' body, I must say that it is pretty much sufficient for most amateur shooters. Roughly two years ago I bought my 400D for S$1300, but today, I am paying two hundred bucks less and I am getting features I could not imagine possible in entry level bodies 2 years ago. I am amazed at how fast technology has progressed. I mean, two years ago it could only be my dream to shoot at ISO 3200 and get a usable image. But today, with the 500D, it is reality. Two years ago, getting full 15 megapixels of resolution could only be something the higher-end bodies could offer, but today, I have it right in my thousand dollar camera. In this respect, I must really say that the 500D is a phenomenal camera. Great image quality, great features, all at a compelling price.

I'm happy shooting 500D. Although it may not be as good as the high-end 5D mark II, it is sufficient. I would prefer spending the money on better lenses. So if any of you are considering an SLR, whether you are a beginner or an advanced amateur, the 500D has a lot to offer, and doesn't burn your pocket. Highly recommended!

Thursday, May 7, 2009

Why NOT to shoot RAW

Many advanced photographers love shooting in RAW on digital SLRs, for obvious benefits. Many photography articles have been written and much has been said on why shooting RAW is ideal, chiefly for image quality and headroom for digital manipulation.

However, let me play devil's advocate and offer you some reasons why RAW might NOT be the ideal choice for you.

1) RAW files are huge. While JPGs are typically under 5MB, RAW files are usually 10-20MB in size. This means that you will need larger capacity memory cards and computer disk space. Also, this implies that your camera will take more time to write these files to the card than JPGs. If you are shooting a big event, or worse still on a long holiday, that could mean a few hundred RAW files and a lot a lot of space is required to store them.

2) Processing RAW files are more time-consuming than JPGs. Let's face it: post-processing is a tedious chore and a waste of our precious time. Having to process the RAW file in a RAW converter needs effort, skill and the technological know-how. On the other hand, JPGs are "ready-to-use" images out of the camera with sharpening, saturation, noise reduction and so forth already applied for you. Also, processing RAW files require a fast computer, whereas even the slowest laptop (i.e. netbooks) can open JPGs with ease.

3) JPG is a universally compatible file format, whereas reading the RAW file requires special software, such as Adobe Camera RAW in Photoshop or Adobe Bridge. Also, if you use software by Adobe, Apple or others, you may have to wait for some time (maybe a month?) until there is an update which supports your camera. Thus, for archiving purposes, JPG is a better format as you can be sure it will be supported long into the future.

Generally, I only shoot in RAW when doing serious photography. For everything else, JPGs will suffice... such as snapshots, events coverage, birthday parties, random shots etc.

The point I am trying to make here is that you should know when shooting RAW is appropriate, and when it might be over-kill.

Saturday, April 4, 2009

Crumpler industry disgrace neck strap - mini review

One week ago, I purchased the Crumpler Industry Disgrace camera neck strap, branded with Canon EOS, as a replacement for the usual Canon strap that came with my 400D.


The strap costs me slightly over $30 bucks, but it was definitely worth my money. So many photographers use camera straps provided by the camera manufacturer and never think twice about it. Usually these lousy straps aren't comfortable at all. Most of them fail to ease the load of the camera, and as a result the strap 'cuts' the skin, causing discomfort when hung over the neck or slung over the shoulder for a prolonged period of time.

This is where the Crumpler industry disgrace excels in - comfort. Firstly, it is noticeably broader in width than any other strap, making your camera feel lighter when slung over your neck. It also looks different. Instead of a long straight strap, this one is moulded into a vague 'U' shape, allowing it to wrap over the neck for a secure fit. A special grip print also ensures that the strap fits well around the neck. There is also a breathable air mesh strap which gives very nice padding over your neck.

Assembling the strap onto your camera is easy. You fit it in like any other strap, and it stays securely in place. The strap also features double length adjustment, giving you the flexibility to change its length very quickly.

The only problem with this strap is that of storage. Because it is slightly thicker and broader than other straps, keeping it in your camera bag might be slightly challenging if space is little. Also, it is not as 'foldable' as other cheap straps.

All in all, I have nothing but praises for the Industry Disgrace... this strap is especially suited for photographers who carry heavy equipment, and makes life a lot more comfortable!

Wednesday, February 18, 2009

Photo tip: getting more dynamic range in-camera

Ever encountered a high-contrast situation where your camera is unable to capture the entire dynamic range of the scene? Such as shooting landscape photos on a sunny day?

In this photography tip, I will teach you how to get the maximum dynamic range from a photo straight out of the dSLR. It's pretty easy actually, and just needs a bit of tweaking of your camera's image processing parameters.

In order to minimise the problem of blown highlights in high-contrast scenes, you should TURN DOWN the contrast parameter found on your camera. For Canon EOS users, this can be found under picture styles.


What this does is to reduce the contrast of your images, giving it better highlights and shadows. However, the picture will have less 'pop'. In terms of the histogram, reducing the contrast will push the shadow region toward the right (making it brighter) while the highlight region will be pulled left (making it darker), thus the overall histogram is being 'compressed'. The result is that what you capture on screen is closer to what your eyes sees, in contrasty situations.

While this tip may not fully solve extremely high-contrast environments, it will go some way to help you get better pictures straight out of camera without the need for HDR/blending multiple exposures in post-processing.

Sunday, February 8, 2009

Fujifilm announces the F200EXR with unique sensor


Got to hear of this latest Fujifilm point-and-shoot from dpreview. Although it may look and sound like any other average compact camera, it isn't. This camera is revolutionary as it is the first to use Fujifilm's EXR technology that can use the sensor in three different ways to optimise resolution, dynamic range or low-light performance. That's the big deal about this camera that struck me. In this day where camera manufacturers are cramming ever more pixels onto small sensors on compact cameras, this emphasis on low-light performance and dynamic range is much valued. Yet the camera does not compromise resolution, which makes it even more desirable.

Basically the way the camera works is that in high resolution mode, all 12 million pixels on the sensor will be used to capture the image. This mode would be ideal in outdoor settings when light is strong.

Then, the other mode to get best low-light performance is the high sensitivity mode. In this mode, the camera shoots at 6 million pixels (half the native resolution) and can go up to ISO6400 (or 12800 in 3MP). Two adjacent pixels 'join' together to produce 6 million large photodiodes, which are big enough to absorb light in the darkest of conditions. Supposedly, this gives extremely good image quality with minimal noise even in dark environments. This is a very innovative move, and sounds effective in theory, but then again until the camera ships we cannot verify Fujifilm's claims.

Lastly, in the high dynamic range mode, the camera captures different exposures with two sets of six million pixels, which, when combined, gives an excellent level of detail in highlights that would otherwise be lost. Also, a highly innovative feature which will prove very useful in high contrast scenes.

All in all, this may be a very popular camera, especially with pro-photographers who demand maximum image quality from compact cameras. Will this be as successful as the LX3? It remains to be seen... but the feature set of the Fujifilm F200EXR on paper is very compelling. In addition to the unique sensor, there are other features such as dual image stabilisation, a 5x wide-angle zoom lens, film simulation mode, full manual controls... but the downside is it doesn't shoot RAW and has no hot-shoe mount, something the LX3 has. (:

Monday, December 22, 2008

10 ways Panasonic can improve the LX3


The Panasonic Lumix LX3 is an incredible compact camera. Having used it for about two months, I think I have roughly understood this high-end P&S. I brought it with me on my China holiday in beautiful Yun Nan this month, and the LX3 performed well beyond my expectations. In fact, because of its size and ease of use, I find myself shooting more with the LX3 than my 400D in China.

Despite how good it is, there is always room for improvement. Here are my top 10 improvements I would like to see in the next version of this series.

1) Longer zoom (more than 3X)
The current 2.5 times zoom is fine for landscape, but for things like portraits a longer focal length is greatly appreciated.

2) Built-in lens cap
The current SLR-like lens cap is annoying to take on and off when shooting, and increases the size of the already huge lens. Without attaching the cap to the camera body, it can be lost easily. But when attached with the provided string, it dangles about dangerously and may hit against the body. A built-in cap is more convenient and practical.

3) Wrist strap
This is a minor problem. The LX3 does not come with a wrist strap; it only has an SLR-like neck strap, which is long and cumbersome. To solve this, use a wrist strap from your old compact cam.

4) Better high ISO performance
As it is, the LX3 is one of the better low light compact cams I've seen. However, it is still incomparable to high ISO performance even on the entry-level dSLRs, such as the Canon 1000D. On the LX3, anything above ISO 800 is unusable because the noise reduction obliterates any details. If you're printing large prints, ISO 400 is about the limit for retaining image quality. Nonetheless, I must say that at ISO 80/100, image quality is astoundingly good, producing noiseless photographs.

5) Better WB performance
In daylight conditions the white balance is generally fine. However, in tricky or low light situations, white balance tends to go horrendously off without flash, as with compact cams generally. Shooting in RAW definitely helps to counter this problem.

6) Stiffer mode dial
This is really me being anal-retentive... but I would like the mode dial to be stiffer so I don't accidentally turn it.

7) Scratch-proof screen
I passed the LX3 to my sis for 2 days and it came back with many surface scratches on the large 3 inch screen. Would really appreciate a scratch-resistant screen (like the iPod touch).

8) Better video recording format
Video on the LX3 is recorded in the old Quicktime motion JPEG format (.mov), which produces very huge files (though quality is good). Would appreciate a more compatible file extension such as .mpeg4 and smaller file sizes.

9) More powerful flash
I noticed that the flash could be more powerful, especially when taking wide angle group shots in low light. However, for fill flash in backlit conditions, the flash suffices.

10) Sturdier battery/SD card door
This is another small issue that only anal people like me bother about. The rectangular door housing the battery and SD card is a bit flimsy. I would appreciate a stiffer and sturdier door.

Having listed my 10 ten improvements, I hope the next revision of the LX series will get better and these complaints (some very minor) will be addressed. Do bear in mind that this list does not in any way suggest that the LX3 is inferior, for indeed this is one heck of a camera that really impresses.

Tuesday, November 25, 2008

ACR / DNG converter update


HOORAY!! The folks over at Adobe has finally updated Camera Raw to version 5.2, supporting 7 new camera models, including the Panasonic Lumix LX3!

Finally, I will be able to shoot RAW on my LX3 and process the files in my preferred raw converter! ACR 5.2 is a free update available immediately at Adobe's website.

This plug-in for Photoshop adds RAW support to these following camera models too: Canon EOS 5D Mark II, Canon PowerShot G10, Panasonic DMC-G1, Panasonic DMC-FX150, Panasonic DMC-FZ28, Panasonic DMC-LX3 and Leica D-LUX 4.

Update (29 Nov 08): ACR 5.2 will ONLY work with Photoshop CS4 and NOT older versions of CS. The latest version of ACR is 4.6 for CS3.

Wednesday, November 19, 2008

Why LX3 over G10

The Panasonic LX3 and the Canon G10 are both superb cameras in their own way. These are high-end point-and-shoot cameras aimed at photographers who need a pocket camera to complement their dSLR. But I got a LX3 over the G10. It's my first Lumix, and I'm extremely pleased with my purchase.

Here's why I chose the LX3 over the G10:

1) The G10 shoots at 15 megapixels, while the LX3 shoots at only 10. I do not need that extra resolution, as I will never be printing images from a pocket camera to such as huge size. Those extra pixels will only serve to slow down my post-processing with the larger file size. Besides that, 15MP crammed onto such a tiny sensor is going to have its consequences. The pixel pitch is much smaller than the LX3's, and therefore, noise performance is slightly worst than the LX3's. But with both these cameras, anything above ISO 800 is only for emergency.

2) The LX3 is smaller in size than the G10. If I'm going to buy a compact camera, it better be small enough to carry around, thus my choice with the LX3. The G10 is heavier and heftier, but the advantage is it offers better grip (obviously).

3) The LX3 is cheaper than the G10, by about $100.

4) The LX3 has a wider and faster lens than the G10. On 35mm equivalent, the LX3 has a 24-60mm f2.0-2.8 lens, while the G10 has a 28-140mm f2.8-4.7 lens. An f2 lens, coupled with image stabiliser, will mean I can get faster shutter speeds on the LX3 than on the G10, and this is just what I need in low-light situations. Furthermore, the 24mm wide angle is an advantage when taking group shots, and is nice to have in landscape photography too. The compromise is that the LX3 only has a 2.5X optical zoom, and doesn't have as far a reach compared to the Canon. But that's fine for me: most of the time I'm doing wide-angle stuff. Your decision will vary according to your shooting needs.

5) LX3 does incredibly good HD video (1280x720 @ 30fps). The G10 on the other hand only does mediocre 640x480 video. The downside is that video on the LX3 is stored as Quicktime motion JPG, which is an aging format, and file sizes tend to be huge. But still, the quality is stunning!

6) LX3 has a switch dedicated to changing aspect ratios - 4:3, 3:2 or 16:9. The cool thing is that in any aspect ratio, the same angle of view is maintained. As a result, you make the most of the sensor's area, getting similar pixel counts in all modes.

7) The LX3 has some really cool scene modes, notably the film grain mode, which simulates B&W film images, and also the pinhole mode, which simulates pinhole images with strong vignetting.

8) The LX3 shoots up to ISO 3200; the G10 only goes up to a max of ISO 1600. Sadly, ISO 3200 on the LX3 is anything but usable. Still, it's an advantage over the Canon.

Thursday, August 28, 2008

The most obscene contraption for the iPhone!


Read this on TUAW. This is simply classic. A Hong Kong company has created an accessory for the iPhone 3G's camera which transforms it into a telephoto lens.

This obscene looking extension is not the end of the joke... the marketing and use of english really makes this product hilarious, and goofy!

The website writes: "Overcome the short coming of camera cellphone that can only near-sighted, it also makes distant view for you at the moment. The new design to run of rays can effectively avoid the contortion of image, and makes the super wide angle, the larger luminous flux, the higher visual acuteness, good for color reduction, which makes the high quality of photography. "

What the heck?

As to whether it really works, I'm unsure, but if I don't even understand the product, how will I buy it?